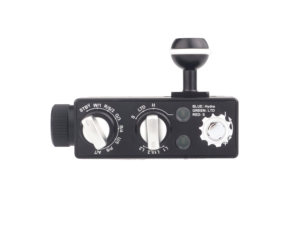
A bare GoPro clipped to a selfie stick produces shaky, blue-tinted footage that looks like every other amateur dive video online. A proper underwater rig — tray, handles, arms, and lights — produces stable, colourful footage that actually shows what you saw down there. This guide walks through every component you need, how they connect, and which Kraken gear fits where, from a basic single-light starter setup to a full dual-light system.
Why You Need More Than Just a GoPro
Three things kill underwater GoPro footage:
- Shake: A hand-held GoPro without a tray is constantly moving — from fin kicks, breathing, and minor current. Even the best digital stabilization can’t fully compensate for a camera that has nothing rigid to grip.
- Blue/green cast: Water absorbs red light starting around 5 metres (15 feet). By 10–15 metres, your footage looks like it was filmed through a blue filter. External video lights restore the natural colour your camera can’t capture on its own.
- Backscatter: Mounting a light directly on or near the camera lens creates a snowstorm of illuminated particles between lens and subject. Lights on arms, positioned away from the camera, angle the beam to avoid this.
A tray and arm system solves all three: it gives you a stable two-handed grip, positions lights where they need to be (away from the lens, angled in), and keeps everything locked in place for a full dive.
The Components of a GoPro Underwater Rig
| Component | What it does | Current Kraken options |
|---|---|---|
| Tray | Two-handed camera grip and arm attachment | TR09; GoPro-style camera mount included |
| Flex arms | Bend-to-position lighting | KR-FLEX01; built-in YS light mount |
| Rigid / float arms | Clamped positioning; float arms add buoyancy | Arms; FA03 / FA04 / FA05 |
| Video lights | Add illumination to nearby subjects | Abyss 6000 / Abyss 10000 / Abyss 20000 |
| Current kit | Select tray, lighting and matching arm style together | Abyss 6000 Action Camera Lighting Kit |
Current pricing: Follow the linked product pages for current prices, configuration choices and availability. Kraken list prices are in USD; Canadian storefront prices convert automatically. No fixed CAD conversion or assembled-rig total is quoted here.
Step 1: The Tray
The tray is the foundation of your rig: it supports the camera and gives you two handles and arm attachment points. TR09 includes a GoPro-style mount. Match that interface to your exact dive housing; do not assume every GoPro housing has a 1/4-20 base.
The TR09 Dual Handle Action Cam Tray is built specifically for action cameras and includes a GoPro adapter in the box. The pistol-grip style handles keep your wrists in a natural position during a 60-minute dive — much less fatiguing than a flat bar tray. Ball mount points on both sides accept standard 1-inch ball accessories.
If you also shoot with a compact or mirrorless camera and want one tray for everything, the TR08 Dual Handle Tray is the broader-compatibility option — adjustable from 8 inches to 11.25 inches for larger housings.
Step 2: The Arms
Arms connect your lights to the tray. You have two options with Kraken trays:
Flex Arms — Quick Adjustment
The KR-FLEX01 Flex Arm has a built-in YS mount and is designed for TR07, TR08 and TR09 trays. It bends into position for quick adjustment without ball-arm clamps. The tray page describes replacing the handle-top mount; the arm page uses different tray-end wording, so confirm the supplied connection and follow the assembly instructions. Secure the light with its matching YS hardware, not by clicking a ball into the flex arm.
For a dual-light setup, you’ll need two flex arms — one per side.
Float Arms — Rigid and Buoyant
Kraken’s FA03, FA04 and FA05 float arms add buoyancy. The Arms page lists ball-to-ball lengths of 3, 5, 8 and 12 inches, and ball-to-YS lengths of 3, 5 and 8 inches. Pair a compatible arm with KR-CL or KR-CLPRO clamps and the appropriate light mount. 1-inch Ball Mount with 1/4-20 Stud is an accessory only where its threaded connection matches the device.
Rigid arms use clamps to hold the selected angle; float arms also offset negative buoyancy. Holding power depends on the load and clamp condition, so test the setup rather than assuming it cannot move in surge. Adjusting a clamped arm requires loosening and retightening the clamp.
Step 3: The Lights
For a compact action-camera video rig, start with Abyss 6000: 6,000 lumens of white flood, 120° coverage, 30 minutes at full output or a listed 45 minutes at 80%. If budget permits, it is the stronger video recommendation than the small Hydra 2200 WSR; auto flash-off on the WSR is aimed at strobe macro, not GoPro video.
- More output: Abyss 10000 — 10,000 lumens, 120° beam, 35 minutes at full power or approximately 60 minutes at 80%.
- Larger scenes: Abyss 20000 — 20,000 sustained lumens, 120° beam, 40 minutes at full flood. Account for its larger body and arm load.
- Video plus fluorescence: Hydra 5000, Hydra 10000 and the newer Hydra 20000 remain valid white-video and colour-mode choices.
Two independently aimed lights can improve coverage and reduce shadows. See our action-camera video-light guide for the full comparison.
How to Position Your Lights
Light position is almost as important as light output. The goal: illuminate your subject without pointing the beam toward the camera lens (which creates backscatter).
The standard starting position for wide-angle GoPro work:
- Arms extended forward and slightly outward from the tray sides
- Lights angled roughly 30–45 degrees inward, toward where the camera is pointing
- The beam should cross in front of the camera — not point back at the lens
For close-focus subjects (a fish face, a coral head), angle the arms slightly forward and down. For wide reef scenes, angle them more outward to maximize coverage. Flex arms let you adjust mid-dive; rigid arms stay put once you clamp them.
Complete Rig Packages
Abyss 6000 Action Camera Lighting Kit is the current ready-to-select option: TR09 tray, single or dual Abyss 6000 lights, and either BM3 ball-to-YS arms with one KR-CL clamp per light or FLEX01 arms. Camera and underwater housing are not included. Confirm your housing’s GoPro-style mount and clearance; an adapter may be required.
| Setup | Components / current option | Use case |
|---|---|---|
| Compact single light | Abyss 6000 kit — Single light; TR09 + one Abyss 6000 + one BM3/KR-CL or FLEX01 arm | Nearby subjects; add a second light later |
| Dual-light starting point | Abyss 6000 kit — Dual light; TR09 + two Abyss 6000 lights + two matching arm assemblies | Independent coverage from both sides |
| Higher-output custom rig | TR09 or TR08 + two Abyss 10000 lights; choose compatible arms, mounts and buoyancy | Wide-angle video with brightness headroom |
| Large-light custom rig | TR08 + Abyss 20000 lights with an appropriately supported arm system | Larger close-range reef and wreck compositions |
| Video and fluorescence | Hydra 5000 or Hydra 10000; Hydra 20000 for high-output WRGBU work | White video plus colour / fluorescence modes |
Current pricing: Follow the linked product pages for current prices, configuration choices and availability. Kraken list prices are in USD; Canadian storefront prices convert automatically. No fixed CAD conversion or assembled-rig total is quoted here.
Putting It Together: Step by Step
- Mount the tray: Use the included GoPro-style mount with a compatible housing, or the correct adapter for your housing. Check clearance and tighten according to the mounting instructions.
- Attach the arms: Assemble the selected FLEX01 or BM3 arm configuration according to its supplied instructions. For rigid ball arms, secure the tray-side ball joint with the appropriate clamp.
- Mount the lights: For FLEX01 or ball-to-YS arms, secure the light’s YS mount with matching hardware. For ball-to-ball arms, use a clamp and the light’s ball mount. These interfaces are not interchangeable snap fittings.
- Set arm angles: Bend flex arms so lights point inward at roughly 30–45 degrees. For rigid arms, position and tighten clamps. Do this on land in good lighting so you can see what you’re doing.
- Check your buttons: Make sure you can still reach the GoPro’s record button and mode switch with the tray in hand. The TR09 pistol grips are designed to keep access clear.
- Buoyancy check: A fully rigged tray-and-two-lights setup adds weight. Test your buoyancy with the rig in a pool or shallow water before your first deep dive.
Tips for Better Action Camera Footage
Get Close
The single biggest improvement most GoPro divers can make: get closer to your subject. Water between lens and subject reduces contrast and colour even with lights. Half the distance = dramatically better footage. GoPro’s wide angle makes it forgiving — you can get surprisingly close before the subject leaves the frame.
Set the Controls Before You Descend
Set and practise the controls before the dive, then switch the lights on in the water when needed. Avoid running high-output underwater lights continuously in air. The Abyss 10000 is rated at 35 minutes at full power, or approximately 60 minutes at 80%; plan illuminated shooting time rather than assuming an hour at maximum.
Use White Balance Lock
GoPro’s auto white balance can shift while you’re filming, causing colour to jump mid-clip. Lock white balance to a fixed setting (usually 5500K or “Dive” mode if available) when shooting with lights. This keeps colour consistent across your entire dive.
Stabilisation Settings
GoPro’s HyperSmooth stabilization works well but crops the frame. For wide-angle reef footage where you want the full field of view, turn stabilization to Standard or Off and let the tray do the stability work. For anything involving movement — swimming through a school of fish, following a turtle — HyperSmooth is worth the crop.
Shoot at 4K60 or 4K30
4K60 gives you the option to slow footage down to 50% in post (producing smooth 30fps slow-motion) while retaining full 4K resolution. 4K30 is fine for steady reef footage. Avoid 1080p for anything you plan to edit or share beyond social stories — the extra resolution gives you cropping flexibility in post.
A Quick Note on Red Filters
Red filters are sometimes recommended for GoPro diving — they’re a cheap way to add some colour back at shallow depths. But they only work well in specific conditions: clear tropical water, bright sun, between 3–8 metres. Below 10 metres, filters lose effectiveness fast. In low visibility, they make things worse. And at night, they do nothing.
If you’re using a Kraken Smart Housing with your smartphone (not a GoPro), the KRH-07/08 Red Filter is an option for shallow snorkelling. For actual scuba diving with any camera, video lights are always the better investment.
Frequently Asked Questions
Do I need a housing as well as a tray?
Use a dive housing matched to your camera model and planned depth; bare-camera depth ratings vary. The tray supplies handling and mounting, not waterproofing. The current Abyss kit excludes camera and housing.
Using a smartphone instead? Smart Housing V2 — KRH08 and Smart Housing V2 PRO — KRH07 use physical Bluetooth controls with the Kraken Next Gen app, not direct touchscreen access. The PRO adds depth and temperature sensors; the KRH08 does not. Check exact phone fit and current app support. KRL-07 Wide Angle Lens is a Smart Housing accessory, not a GoPro lens; confirm the required lens-mount adapter for your housing.
Can I use just one light instead of two?
One light is much better than no light, and a good starting point on a budget. The limitation: a single light always produces stronger illumination on one side of your subject, creating subtle shadows on the other. For close macro-style subjects this is often fine or even desirable. For wide reef scenes, a single light produces uneven coverage. Two independently aimed lights can give you more even illumination that makes footage look professional.
How do I stop backscatter with my GoPro?
Backscatter (the white specks and haze from particles in the water) gets worse when lights are close to the camera lens axis. The main fixes: (1) use arms to move lights out and away from the lens, (2) angle lights inward so beams cross in front of the camera rather than directly toward the lens, (3) avoid diving in poor visibility when avoidable, and (4) don’t use lights in very shallow, clear water where natural light is sufficient — the contrast between lit and unlit areas can make backscatter worse.
Does the TR09 work with DJI Osmo Action and Insta360?
TR09 includes a GoPro-style camera mount. For DJI or Insta360, check your exact camera housing’s mounting interface and clearance; a model-specific adapter may be required. Do not assume every housing has the same thread or fits without an adapter.
What’s the difference between flex arms and rigid ball arms?
The KR-FLEX01 is a bend-to-position arm with a YS light mount. For rigid mounting, Arms offers ball-to-ball lengths of 3, 5, 8 and 12 inches and ball-to-YS lengths of 3, 5 and 8 inches. Float arms add buoyancy; use matching KR-CL clamps at ball joints. Choose the system that supports your light load and gives you the adjustment style you prefer.
When should I use a red filter instead of lights?
Honestly? Almost never for scuba diving. Red filters only help in shallow, clear, sunny water (under 8 metres). Below that, they don’t restore enough colour. For snorkelling in tropical conditions, a filter is a cheap addition that helps. For nearby subjects on a dive, lights add illumination; distant wide scenes may still call for an ambient-light workflow. The Smart Housing red filter is designed for the Kraken Smart Housing — it doesn’t fit GoPro housings.
Still deciding which tray and lighting configuration suits you? Compare the options in our GoPro underwater camera tray buying guide.