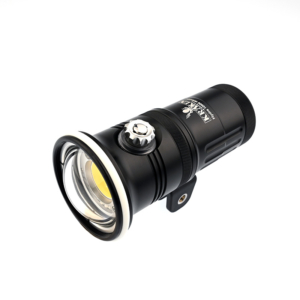
Snoot photography is one of the most dramatic techniques available to underwater photographers — and one of the most misunderstood. A snoot narrows your light into a controlled beam, isolating your subject against a pure black background and eliminating every distraction the reef throws at you. The result looks theatrical, almost cinematic: a spotlight in the dark. This guide covers everything you need to start snooting, from what a snoot actually does to the specific techniques, camera settings, and Kraken gear that will get you there faster.
S80 or S80+: choose the beam for the way you shoot
Both strobes deliver 80 Ws; the difference is how they direct that flash. The KR-S80 uses a round flash tube for broad coverage. The KR-S80+ uses a straight flash tube and a more directed beam, allowing a snoot to capture the light more effectively. For photographers building a setup around snooted macro, that is a practical reason to choose the S80+—not simply a higher guide number on a specification sheet.
Choose S80+ when snoot efficiency and directed lighting are priorities. Choose S80 when broader native coverage better suits your shooting. The S80+ lists over-60° flash coverage, expanding to 100° with a diffuser; the S80 is the broader native-coverage option. The S80 catalog’s numerical coverage differs across fields, so no single comparison figure is asserted here. Neither replaces the other: choose the beam pattern for your subjects and lighting accessories.
Both are manual strobes with a built-in 3000-lumen video light. The KR-SN07 optical snoot fits both the S80 and S80+ directly, with no different adapter required. They share the same body; the S80+ differs in its internal flash tube and LEDs.
What Is a Snoot?
A snoot is a device placed over a strobe or video light that restricts and focuses the beam of light into a narrow circle. The snoot itself produces no light — it takes the output from your existing light source and shapes it into a controlled spot.
Think of it like a spotlight in a theatre. The performer is lit exactly as the lighting designer intended. Everything outside that circle goes dark. Underwater, your subject is the performer — a nudibranch, a frogfish, a shrimp — and everything else: the messy coral, the algae, the sponge the animal is sitting on — disappears into black.
That’s what snooting delivers. Not more light. The right light, precisely where you want it.
Why Snoot? The Case for Minimal Light
Most underwater photography relies on the opposite of snooting — wide-beam strobes throwing light across the entire scene, hoping to illuminate subject and environment together. That works well for reef wide-angle shots and environmental portraits. But for macro subjects in complex environments, it often produces cluttered, flat-looking images where the viewer’s eye doesn’t know where to land.
Snooting solves specific problems that wide lighting can’t:
- Cluttered backgrounds: The reef is beautiful but chaotic. A snoot erases the chaos and forces the eye onto your subject.
- Camouflaged subjects: Frogfish, scorpionfish, and cryptic critters are perfectly evolved to blend in. A snoot reveals them by contrast rather than colour.
- Backscatter: Wide strobes illuminate every particle between lens and subject. A narrow snoot beam hits almost nothing in the water column — significantly reducing backscatter in murky conditions.
- Translucent subjects: Jellyfish, shrimp, and glassy fish light up with a quality no wide strobe can replicate when a snoot illuminates them from the correct angle.
- Drama: Some subjects just look better with a spotlight than with even, flat lighting.
Types of Snoots
| Type | How It Works | Light Quality | Ease of Use | Best For |
|---|---|---|---|---|
| Barrel / Tube | Simple narrow tube blocks outer light | Moderate — edges can be harsh | Easy, DIY-friendly | Beginners, budget builds |
| Optical | Internal lenses collimate the beam | Excellent — crisp, defined circle | Moderate | Macro, portrait, precision work |
| Fibre-optic | Flexible fibres channel light to tiny exit point | Excellent — extreme precision | Advanced | Super-macro, tight spaces |
Optical snoots are the most popular choice among serious underwater photographers. They produce clean, well-defined circles of light with natural falloff at the edges, and can transmit a compatible strobe’s aiming light so you can check the illumination before shooting.
Strobe Snooting vs. Continuous Light Snooting
Almost every snoot guide you’ll find online focuses on strobe snooting — attaching a snoot to a flash unit. That’s the traditional approach and it works well. But there’s another method worth knowing: continuous light snooting with video lights.
With a continuous LED light and a snoot attachment, you can achieve the snoot effect on video as well as stills. What you see is what you get — the light falls on your subject in real time, so you can watch how it looks and adjust before you shoot.
Use the supported snoot on the light’s white output first: coloured LEDs may not align with the snoot optics in the same way. Adjust brightness to exposure rather than assuming maximum power is always required. FT06 colour gels offer a separate way to colour the snooted beam and are listed for both compatible video-light snoots and strobe snoots.
Strobes remain the better option for freezing motion at macro distances due to their very short flash duration. For stationary subjects — nudibranchs, scorpionfish, shrimp in crevices — continuous light snooting works beautifully.
Kraken Snoot Products
Snoot Light V2 — Dedicated Continuous Light
The Snoot Light V2 is a standalone continuous light, so no separate video light is required. Its description lists a 15mm beam diameter at 100mm underwater and 80 minutes at full power. Select current colour options on the product page rather than relying on the old colour list.
- Buy this if: You want a dedicated, self-contained snoot light without needing to own a separate video light first.
- Skip it if: You already own a compatible light — choose KR-SN10 or KR-SN09 only after checking the exact model and generation.
KR-SN10 — Snoot for Hydra 3K/5K and Abyss 6K
The KR-SN10 fits the current Hydra 3000 V2, Hydra 5000 and Abyss 6000. It does not fit old Hydra 5000 versions with a round-shaped battery. Use white output as the starting point, then adjust exposure and working distance. FT06 filters are explicitly listed as compatible. Follow the product link for current pricing.
- Buy this if: You own a Hydra 3000 V2, Hydra 5000, or Abyss 6000 and want to add snooting without buying a dedicated unit.
KR-SN09 — High-Output Video-Light Snoot
KR-SN09 lists compatibility with Hydra 10000, Abyss 10000, Hydra 12000, Hydra 20000, Abyss 20000 and Spectrum 25000. It is the current high-output alternative to KR-SN10. Spectrum 18000 is not listed; do not infer compatibility merely from output or body diameter.
Legacy Hydra Optical Snoot — KR-SN03
Optical Snoot Hydra Series has legacy adapter descriptions for Hydra 4000/6000 and Hydra 8000, with other model groups in its attributes. These fields are not a single unambiguous compatibility list. Existing owners should confirm their adapter with Kraken; do not select it as a universal current-Hydra snoot.
Strobe Snoots: KR-SN06, KR-SN07, KR-SN08
Kraken offers dedicated optical snoots for their strobe lineup — the right choice if you’re a flash photographer:
- KR-SN06 — fits the KR-S160 strobe
- KR-SN07 — fits the KR-S80 and KR-S80+ strobes
- KR-SN08 — fits the KR-S40 strobe
For a new snooted-macro strobe setup, KR-S80+ is the more directed 80 Ws option: its straight flash tube improves snoot light capture. KR-S80 retains broader round-tube flash coverage. Both use the same body and accept KR-SN07 directly; neither requires a different snoot adapter.
FT06 Color Filters
The FT06 Color Filters are six colour gels for compatible video-light and strobe snoots. The catalog explicitly lists KR-SN10, KR-S160 snoot, KR-SN07 and KR-SN08. Do not infer that every accessory described as a snoot accepts the same gel holder. The included colours are red, blue, yellow, orange, green and magenta.
Camera Settings for Snoot Photography
The goal of snoot settings is to eliminate ambient light entirely, so the only light in the image is from your snoot. That means:
- Aperture: f/16 to f/22 — small aperture = minimal ambient light reaching the sensor
- Shutter speed: 1/200 to 1/250s only if within your camera’s supported flash-sync limit; for continuous light, balance shutter speed against exposure and motion
- ISO: 100–200 — low ISO = less ambient light captured
These settings will produce a nearly black background. Any lighter means ambient light is getting through — tighten the aperture or increase shutter speed.
For wide aperture snooting (shallow depth of field, 3D look): try f/3.5–f/5.6 with lower snoot power. You’ll get a more artistic, painterly result rather than the classic hard-edged spot look.
For backlighting effects: f/10, 1/200s, ISO 400 — let more light in to create a glowing rim-light effect around translucent subjects.
Starting Techniques: How to Actually Aim a Snoot
The biggest challenge in snoot photography isn’t the camera settings. It’s getting that narrow beam of light to hit the subject precisely. Here’s how to start:
Step 1: Mount on the Left Side
Attach your snoot to the left arm of your rig. This lets you adjust the snoot with your left hand while keeping your right hand on the shutter and settings. Dual-hand adjustment is difficult and task-loading underwater.
Step 2: Practice on Land First
Before you get in the water, point the snoot at a small object and see where the beam lands. Understand the relationship between arm position, snoot angle, and the circle of light. This costs nothing and will save you an entire frustrating dive.
Step 3: Start in the Sand
On your first snooting dives, find a flat sandy patch and spend time aiming the beam at small rocks or shells. Get comfortable with micro-adjustments before you try hitting a 2cm nudibranch.
Step 4: Choose Stationary Subjects
Snooting a moving subject is expert-level work. Nudibranchs, scorpionfish, frogfish, shrimp in crevices, sea stars — these are perfect starting subjects. Anything that holds still for 30 seconds while you get the beam dialled in.
Step 5: Lock Your Aim Before Shooting
Set the distance to your subject, get the beam landing where you want it, then tighten the arm clamp. Make fine adjustments by moving the camera slightly — don’t keep loosening clamps mid-sequence.
Snoot Positions and Their Effects
| Position | Setup | Effect | Best Subjects |
|---|---|---|---|
| Top-Down Spotlight | Snoot directly above subject | Classic spotlight, strong shadows below | Most macro subjects — first technique to learn |
| 45° Portrait | Snoot angled down at 45° | Less harsh shadows, more natural look | Nudibranchs, portraits, rhinophore detail |
| Side Cross-Light | Snoot at 90° to the camera | Reveals texture and dimension | Hairy frogfish, textured subjects |
| Rim / Backlight | Snoot behind or slightly behind subject | Glowing outline, translucent glow | Jellyfish, fins, translucent shrimp |
| Detail Light | Snoot tightly focused on one feature | Extreme isolation — eye, rhinophore, claw only | Close-focus macro, artistic shots |
Common Mistakes and How to Avoid Them
Rushing the Aim
New snooters rush. They see a good subject, put the snoot in approximately the right direction, and shoot. The result is a spotlight on the sand behind the subject, or a half-lit nudibranch. Take your time. Snoot photography rewards patience. If you can’t get the beam dialled in before the animal moves, let it go and find a stiller subject.
Ignoring the Aim Light
Use the strobe’s aiming light if your setup provides one; an optical snoot does not necessarily contain a separate LED. For continuous-light snooting, you can see the light on the subject directly. Check that the aiming beam and final exposure land where expected.
Wrong Distance
Every snoot has a sweet spot — an optimal distance from snoot tip to subject where the beam is cleanest and brightest. Too far and the light falls off; too close and you get hotspots. Find the sweet spot for your snoot by testing in a pool or on land. Working distance varies with the snoot; the Snoot Light V2 description specifies its beam at 100mm underwater.
Shooting in Current or Surge
Snoot photography needs calm water. Surge and current mean your snoot position is shifting constantly. Save snooting for sheltered sites, muck diving, or slack tide on exposed reefs.
Poor Buoyancy Control
Snoot shooting requires micro-level buoyancy control. You’re working centimetres from a subject with more arm extensions than usual. If you’re not comfortable holding position for 30–60 seconds without touching the bottom, practice buoyancy first.
Giving Up After One Dive
Every serious snoot photographer has a first dive where nothing works. The beam doesn’t hit anything, the settings are wrong, the subjects keep moving. This is normal. Give yourself three or four dedicated snooting dives before judging whether the technique is for you. By dive four, it starts clicking.
Which Kraken Snoot Setup for Your Situation?
| If you… | Start with |
|---|---|
| Are new to snooting, want a self-contained unit | Snoot Light V2 |
| Own a Hydra 3000 V2, Hydra 5000, or Abyss 6000 | KR-SN10 — instant snoot, white light |
| Own a KR-S80 or KR-S80+ strobe | KR-SN07 |
| Own a KR-S40 strobe | KR-SN08 |
| Own a KR-S160 strobe | KR-SN06 |
| Want coloured gel effects on a listed compatible snoot | A listed compatible video-light or strobe snoot + FT06 filters |
| Own Hydra 10000 / 12000 / 20000, Abyss 10000 / 20000, or Spectrum 25000 | KR-SN09 — verify exact model |
Frequently Asked Questions
Is snoot photography only for advanced photographers?
The technique has a learning curve, but the basics are accessible to any diver with solid buoyancy control and some macro photography experience. The first few dives will be frustrating. By the third or fourth dedicated snoot dive, most photographers start getting consistent results. The creative payoff is worth the effort.
Do I need a strobe, or can I use a video light?
A continuous light lets you see the snooted illumination before shooting; a strobe is usually better for freezing movement. Begin with white output on a supported video-light snoot. FT06 gels are listed for both KR-SN10 and the named Kraken strobe snoots, not just strobe setups. Check the exact light, snoot and filter holder before combining accessories.
What’s the best subject for learning snoot photography?
Nudibranchs are the classic starter subject — slow-moving, visually interesting, and common on most dive sites. Frogfish, scorpionfish, and shrimp in crevices are also excellent. Avoid fish or anything that moves quickly until you’ve mastered the basics.
Why does my snooted image look grey/washed out instead of black background?
Ambient light is getting through. Tighten your aperture (higher f-number), increase shutter speed within your flash-sync limit (for strobes), or lower ISO. You need to block all natural light — only the snoot beam should be exposing the image. A true snoot shot at depth should have a completely black background. If there’s any ambient glow, close down until it’s gone.
Can I snoot in shallow, bright water?
It’s harder but possible. Bright shallow water makes ambient-light suppression harder. With strobes, remain within the camera’s flash-sync limit; use aperture and ISO as well as shutter speed. Below about 8 metres is generally much easier for classic black-background snoot shots. In shallow conditions, you may have to accept some ambient light in the background, without changing your planned safe dive profile. Stay within your training and dive limits.
What lens focal length works best for snoot photography?
Macro lenses in the 60mm–105mm equivalent range are the standard choice. They give you working distance from the subject (important for manoeuvring the snoot without disturbing the animal) while keeping subjects large in frame. Very wide lenses can work for creative close-focus wide-angle snooting but require much more precision.
Current pricing: Follow the linked product pages for current prices, configuration choices and availability. Kraken list prices are in USD; Canadian storefront prices convert automatically. No fixed CAD conversion or assembled-rig total is quoted here.